Step 1:
1) Get your device ID: click on CONTROL PANEL, then CLICK on SYSTEM, then CLICK on DEVICE MANAGER2) Under Other Devices/ (or if your video card already has a driver under Display Adapter) click on Video Adapter3) Click on Details, Device Instance Id should already be selected4) You will see something similar to this:
PCI\VEN_10DE&DEV_0DE3&SUBSYS_14471043&REV_A1\4&1595E8D4&0&0008
PCI\VEN_10DE&DEV_0DD1&SUBSYS_20421043&REV_A1\ 4&30DE1B
This single line has all the details about your specific video card maker, chipset and model
VEN_10DE means that the Vendor is 10DE, which is the Vendor ID for NVIDIADEV_0DE3 means that the Chipset is 0DE3, which is the Chipset ID for GT635MSUBSYS_20421043 tells about the Specific Model GT635M in the Asus K55VJ laptop
 Step 2:
1) When you have tried to install and
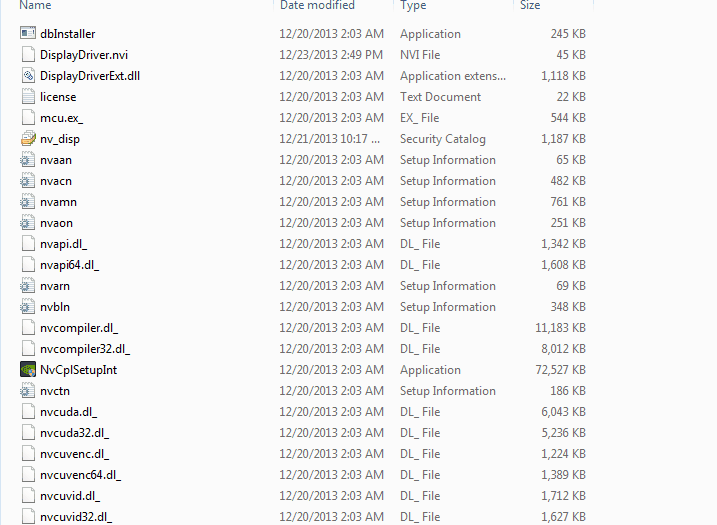
it showed failed, you must have noticed that the files are extracted to
the installation directory. The default directory should be
C:\NVIDIA\DisplayDriver\340.43\Win8_WinVista_Win7_64\International\Display.Driver
2) Locate the INF files there of the type:
nvaa.infnvac.infnvam.infnvao.infnvbl.inf and so on. 3) Pick
any one of them (I picked nvam.inf) and make a backup copy then open
the original in NOTEPAD or your favourite text editor, like Notepad++.
4) Now scroll down, until you see this
Scroll down until you see lines like:[NVIDIA_Devices.NTx86.5.1]%NVIDIA_DEV.0405.01% = Section001, PCI\VEN_10DE&DEV_0405&SUBSYS_15D21043 %NVIDIA_DEV.0405.02% = Section001, PCI\VEN_10DE&DEV_0405&SUBSYS_16341043 %NVIDIA_DEV.0407.01% = Section001, PCI\VEN_10DE&DEV_0407&SUBSYS_080117FF %NVIDIA_DEV.0407.02% = Section002, PCI\VEN_10DE&DEV_0407&SUBSYS_15881043 %NVIDIA_DEV.0407.03% = Section003, PCI\VEN_10DE&DEV_0407&SUBSYS_16181043 %NVIDIA_DEV.0407.04% = Section004, PCI\VEN_10DE&DEV_0407&SUBSYS_16321043 %NVIDIA_DEV.0407.05% = Section001, PCI\VEN_10DE&DEV_0407&SUBSYS_17A21043 %NVIDIA_DEV.0407.06% = Section005, PCI\VEN_10DE&DEV_0407&SUBSYS_3D7B17AA
5) Now scroll down to the section that is similar to your chipset / DEV number
[DO IT CAREFULLY]%NVIDIA_DEV.0CB1.01% = Section041, PCI\VEN_10DE&DEV_0CB1&SUBSYS_203C1043%NVIDIA_DEV.0DEE.02% = Section042, PCI\VEN_10DE&DEV_0DEE&SUBSYS_15621043 %NVIDIA_DEV.0DEE.04% = Section042, PCI\VEN_10DE&DEV_0DEE&SUBSYS_15A21043
3) Pick
any one of them (I picked nvam.inf) and make a backup copy then open
the original in NOTEPAD or your favourite text editor, like Notepad++.
4) Now scroll down, until you see this
Scroll down until you see lines like:[NVIDIA_Devices.NTx86.5.1]%NVIDIA_DEV.0405.01% = Section001, PCI\VEN_10DE&DEV_0405&SUBSYS_15D21043 %NVIDIA_DEV.0405.02% = Section001, PCI\VEN_10DE&DEV_0405&SUBSYS_16341043 %NVIDIA_DEV.0407.01% = Section001, PCI\VEN_10DE&DEV_0407&SUBSYS_080117FF %NVIDIA_DEV.0407.02% = Section002, PCI\VEN_10DE&DEV_0407&SUBSYS_15881043 %NVIDIA_DEV.0407.03% = Section003, PCI\VEN_10DE&DEV_0407&SUBSYS_16181043 %NVIDIA_DEV.0407.04% = Section004, PCI\VEN_10DE&DEV_0407&SUBSYS_16321043 %NVIDIA_DEV.0407.05% = Section001, PCI\VEN_10DE&DEV_0407&SUBSYS_17A21043 %NVIDIA_DEV.0407.06% = Section005, PCI\VEN_10DE&DEV_0407&SUBSYS_3D7B17AA
5) Now scroll down to the section that is similar to your chipset / DEV number
[DO IT CAREFULLY]%NVIDIA_DEV.0CB1.01% = Section041, PCI\VEN_10DE&DEV_0CB1&SUBSYS_203C1043%NVIDIA_DEV.0DEE.02% = Section042, PCI\VEN_10DE&DEV_0DEE&SUBSYS_15621043 %NVIDIA_DEV.0DEE.04% = Section042, PCI\VEN_10DE&DEV_0DEE&SUBSYS_15A21043
Step 3 [MOST IMPORTANT]:
1) Take a look at this pattern. You will make a DEVICE ID for your Video Adapter and insert it hereThe first part is the same for everyone:%NVIDIA_DEVMy DEV is 0DE3, so my device id so far is:%NVIDIA_DEV.0DE3.01%NOTE: If there is already DEVs same as yours then your line will be the next increment i.e.%NVIDIA_DEV.0DE3.02%, or %NVIDIA_DEV.0DE3.03%2) For the section just make it the same as the section where you’re inserting it so I have:%NVIDIA_DEV.0DE3.01% = Section042,3) The next part is the same for everyone so you will have:%NVIDIA_DEV.0DE3.01% = Section042, PCI\VEN_10DE&DEV_4)
Add the rest (your DEV and SUBSYS numbers) so it matches your DEVICE ID
and your finished device ID should look similar to this:%NVIDIA_DEV.0DE3.01% = Section042, PCI\VEN_10DE&DEV_0DD1&SUBSYS_144710435) Insert it, while done it will look like this%NVIDIA_DEV.0CB1.01% = Section041, PCI\VEN_10DE&DEV_0CB1&SUBSYS_203C1043%NVIDIA_DEV.0DE3.01% = Section042, PCI\VEN_10DE&DEV_0DD1&SUBSYS_14471043 %NVIDIA_DEV.0DEE.02% = Section042, PCI\VEN_10DE&DEV_0DEE&SUBSYS_15621043 6) Now scroll down to the [Strings] section it will look like this:[Strings]DiskID1 = “NVIDIA Windows 2000/XP (32 bit) Driver Library Installation Disk 1″NVIDIA = “NVIDIA”NVIDIA_DEV.0405.01 = “NVIDIA GeForce 9500M GS”NVIDIA_DEV.0405.02 = “NVIDIA GeForce 9500M GS “NVIDIA_DEV.0407.01 = “NVIDIA GeForce 8600M GT”NVIDIA_DEV.0407.02 = “NVIDIA GeForce 8600M GT “NVIDIA_DEV.0407.03 = “NVIDIA GeForce 8600M GT “NVIDIA_DEV.0407.04 = “NVIDIA GeForce 8600M GT “NVIDIA_DEV.0407.05 = “NVIDIA GeForce 8600M GT “NVIDIA_DEV.0407.06 = “NVIDIA GeForce 8600M GT “7) Same as before add a line in for your Video card:NVIDIA_DEV.0CB1.01 = “NVIDIA GeForce GTS 360M”NVIDIA_DEV.0DE3.01 = “NVIDIA GeForce GT635M – MKVs INF MOD”NVIDIA_DEV.0DEE.02 = “NVIDIA GeForce GT 415M “NVIDIA_DEV.0DEE.04 = “NVIDIA GeForce GT 415M “NOTE: If there is already DEVs same as yours then your line will be the next increment i.e.NVIDIA_DEV.0CB1.01 = “NVIDIA GeForce GTS 360M”NVIDIA_DEV.0DE3.01 = “NVIDIA GeForce GT635M”NVIDIA_DEV.0DD1.02 = “NVIDIA GeForce GTX 460M – KAPs INF MOD”NVIDIA_DEV.0DEE.02 = “NVIDIA GeForce GT 415M “NVIDIA_DEV.0DEE.04 = “NVIDIA GeForce GT 415M “
Step 4:
1) Save the file.
2) Now
run setup.exe from the installation directory, and this time you should be able to successfully install the Nvidia driver.
NOTE: DO NOT RUN THE DOWNALOADED SETUP FILE. IT WILL OVER WRITE EVERYTHING IF YOU HAVE DONE SO FAR.
3) Install the driver, and once it has been installed just restart your laptop and you are ready to play high end games again.
enjoy and have fun guys....!!!!!


 Now,
most of the users try re installing Windows, Intel HD or Nvidia, trying
out different versions, but this gets pretty lengthy and does not
guarantee that the problem will be resolved. And downloading the
different versions, that’s a sort of irritating job. So, today I will
show you how to do overcome this issue, and successfully install the
Nvidia graphics driver without downloading anything else. The process is
a little tricky one, but its sure that it will not be devastating if
you make any mistake. so here is How to : fix the problem of “Nvidia graphics driver can not find compatible graphics hardware“
Now,
most of the users try re installing Windows, Intel HD or Nvidia, trying
out different versions, but this gets pretty lengthy and does not
guarantee that the problem will be resolved. And downloading the
different versions, that’s a sort of irritating job. So, today I will
show you how to do overcome this issue, and successfully install the
Nvidia graphics driver without downloading anything else. The process is
a little tricky one, but its sure that it will not be devastating if
you make any mistake. so here is How to : fix the problem of “Nvidia graphics driver can not find compatible graphics hardware“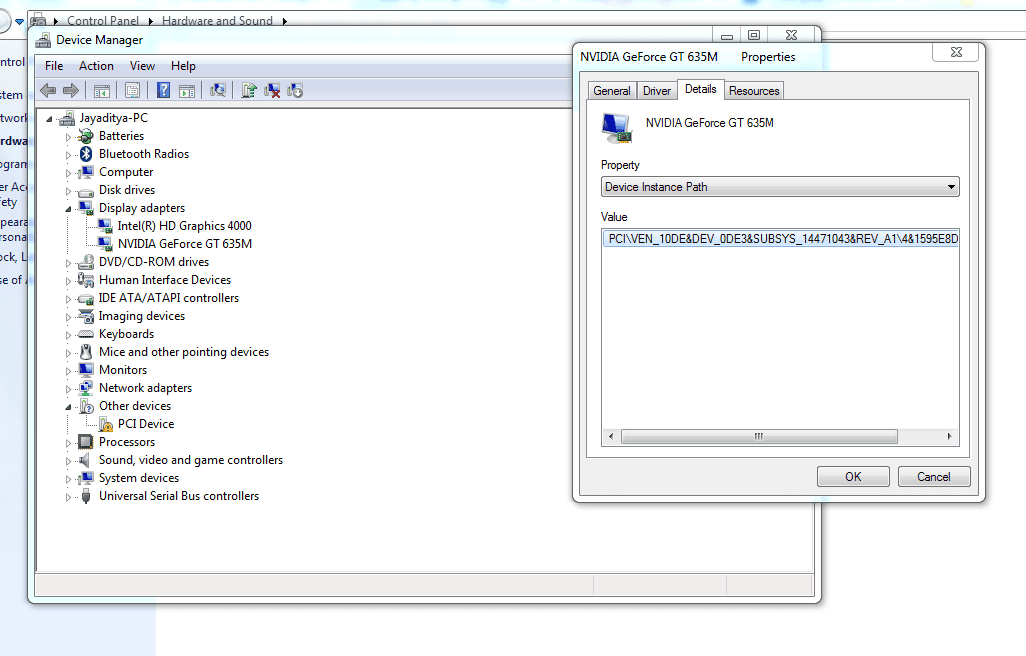
No comments:
Post a Comment